Have you ever spent hours sketching a perfect design only to watch the ink bleed into a blurry mess the second it touches your fabric? It is a common headache for creators, especially when you are working with dark materials or intricate details that seem to vanish before you can even finish your first stitch. I have been there, and I know that a failed 刺繡圖案轉印 (embroidery pattern transfer) feels like a total waste of your creative energy and time.
In this guide, I will show you exactly how to move your designs from paper to fabric using DIY methods and professional heat transfer techniques that stay crisp until the final knot. Whether you are using NT$60 carbon paper for a quick home project or looking for the durability of professional heat transfers, I have the solutions you need. We will explore everything from water-soluble films to high-end manufacturing secrets that cost as low as $0.47 per patch according to May 2026 market data. You will learn when to handle things at your desk and when to let the pros take over to ensure your branding looks flawless every single time.
Key Takeaways
- I will explain why precision at the transfer stage is the essential bridge between your digital art and a high-quality physical product.
- You will learn to master accessible DIY tools like lightboxes and heat-transfer pens to create perfect designs at your own desk.
- I’ll compare manual tracing with professional 刺繡圖案轉印 so you can choose the best method for retaining fine lines and complex gradients.
- Discover my “Dry Heat” rule and fabric patch tests to prevent ink bleeding and ensure your transfers stay crisp throughout the stitching process.
- Learn how to scale your production seamlessly by converting vector files into thousands of consistent, professional-grade emblems.
What is Embroidery Pattern Transfer (刺繡圖案轉印)?
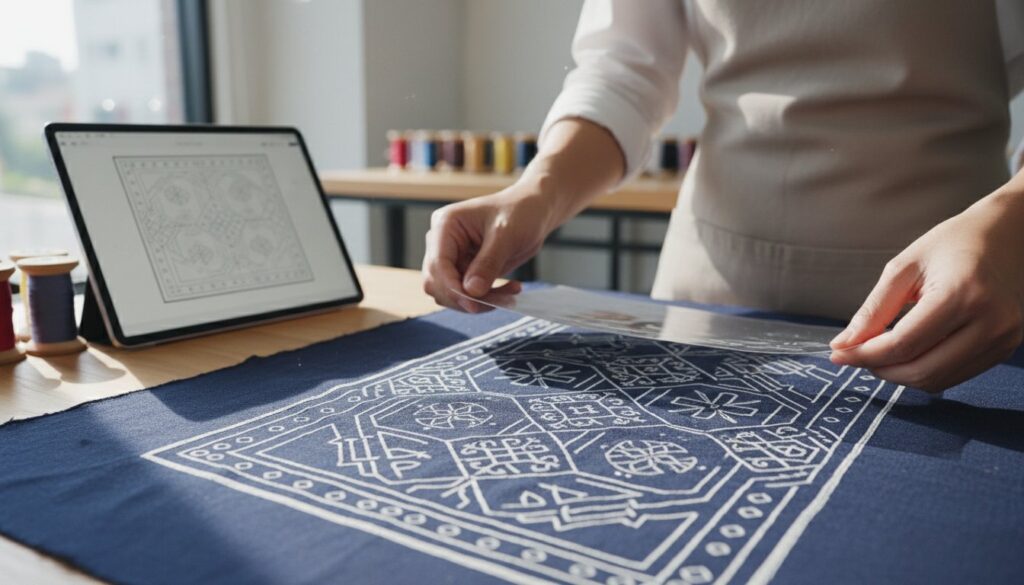
I see pattern transfer as the essential bridge between your digital art and physical needlework. Think of it as a blueprint for a house. If your foundation is off by even a millimeter, the entire structure suffers. In embroidery, 刺繡圖案轉印 ensures your design doesn’t get lost in translation when moving from paper to fabric. Precision at this stage determines whether your final piece looks like a professional emblem or a messy DIY project. I’ve seen many talented artists struggle because they skipped the basics of a clean transfer.
Tracing lines onto fabric isn’t a new concept. Throughout the history of embroidery, creators have used everything from charcoal to pricking and pouncing. Today, we’ve evolved. We’ve moved from basic NT$60 carbon paper packs to advanced methods like sublimation and water-soluble films. As of May 2026, the tech has become so accessible that even home crafters can achieve professional results with minimal equipment. Choosing the right method is about more than just visibility; it’s about protecting your fabric. The wrong ink can bleed, and too much heat can scorch delicate fibers. I want to help you avoid those expensive mistakes by picking the right tool for your specific material.
The Role of Transfer in Custom Patch Making
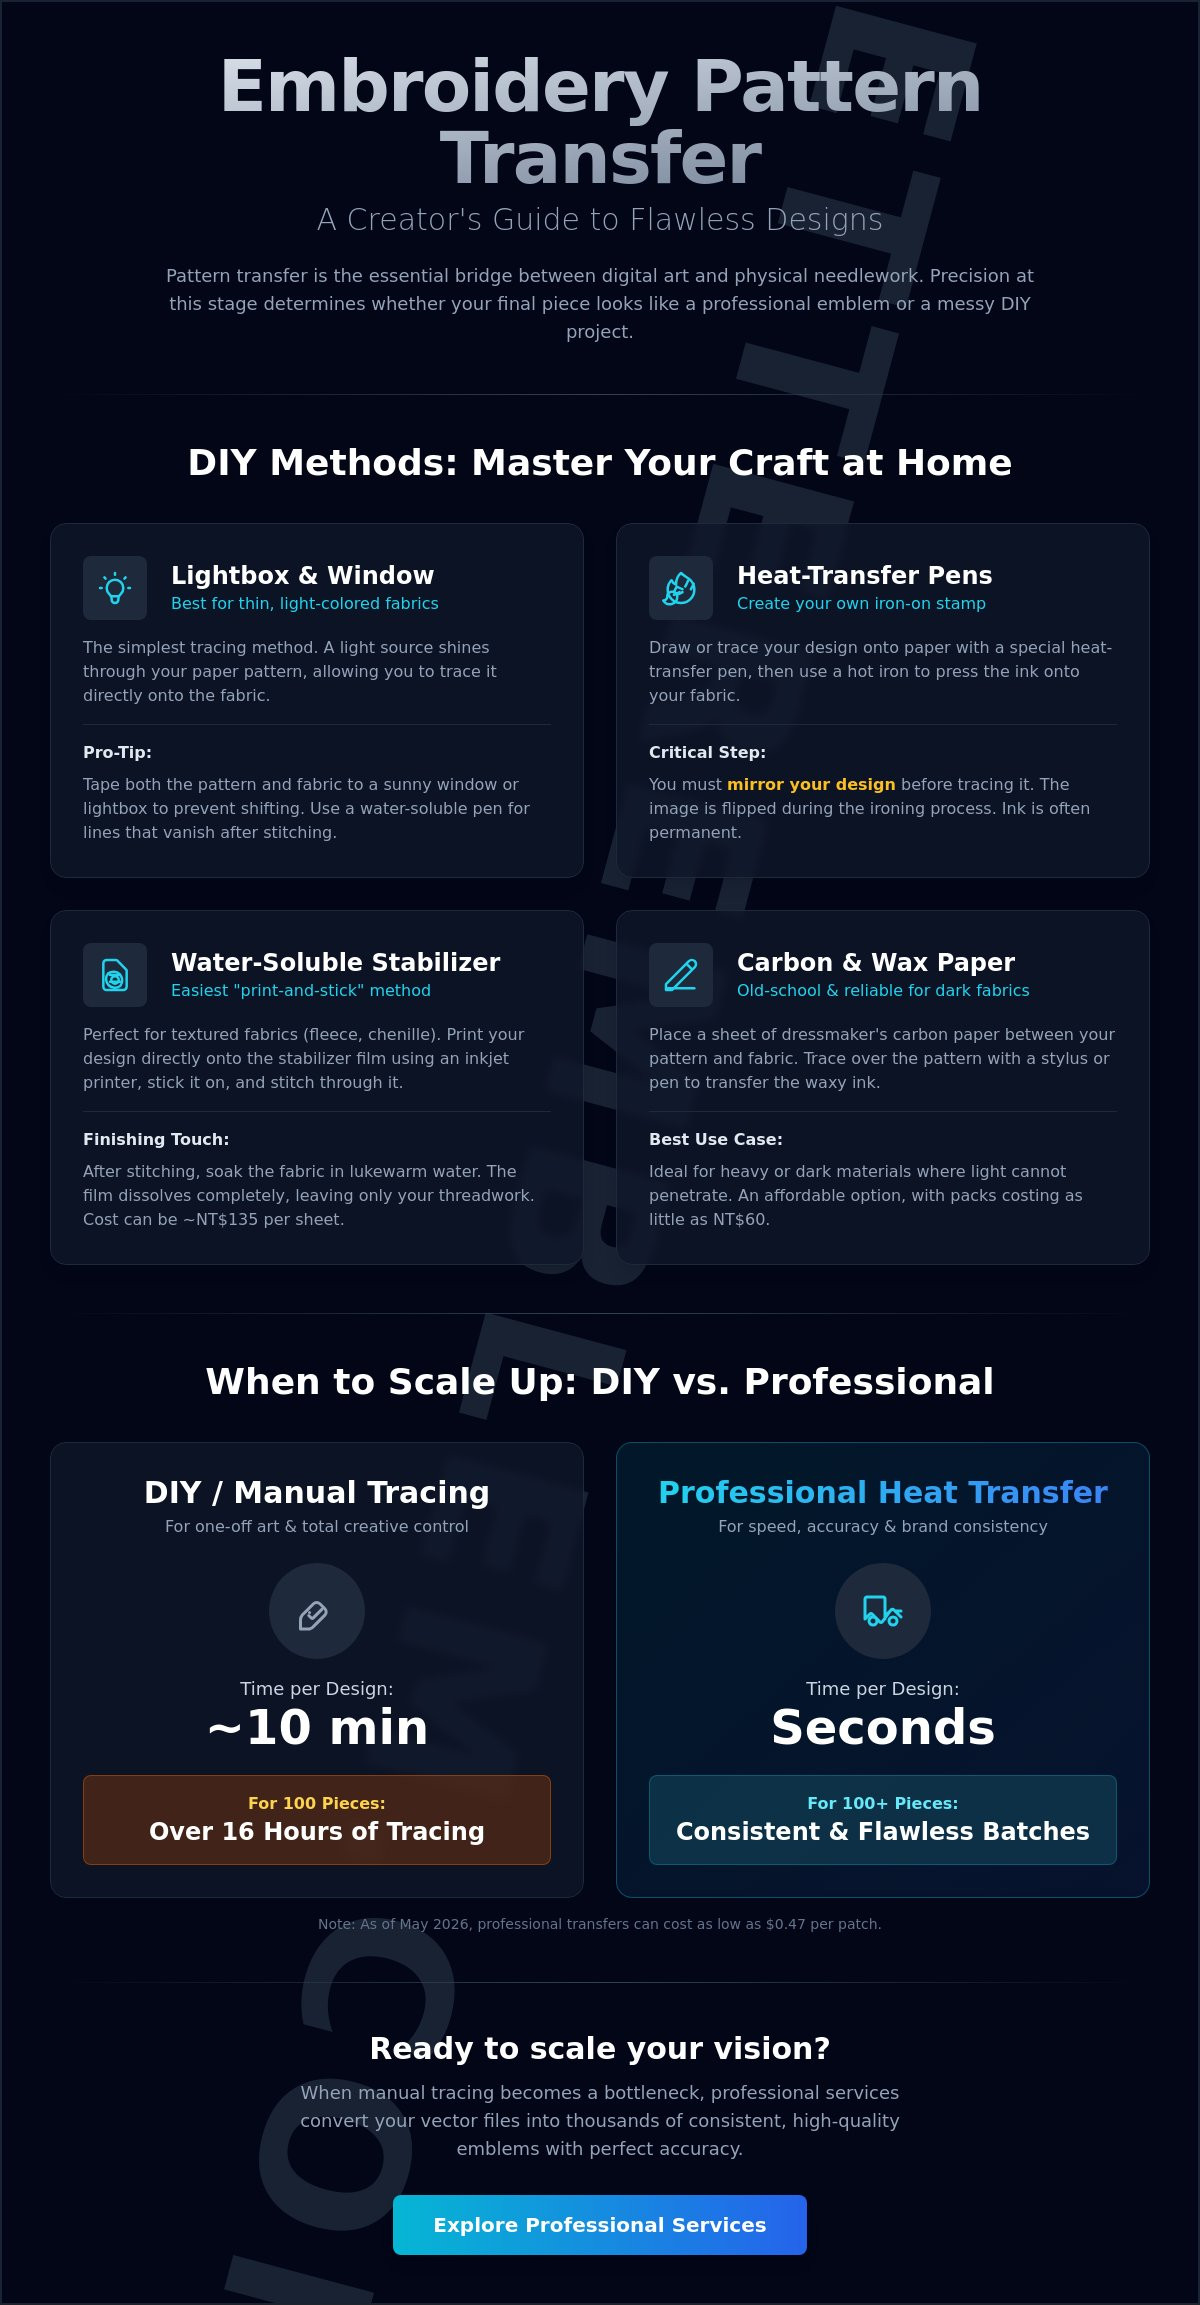
A solid transfer acts as your roadmap for complex stitching. When you’re making high-detail items like woven patches, the process often starts with a digital transfer blueprint. This ensures that every thread lands exactly where it should. The stakes change when you’re scaling up. A manual trace might take 10 minutes per design. If you’re doing 100 pieces, that’s over 16 hours of just tracing. Professional heat transfers cut that time down to seconds while maintaining 100% accuracy across the entire batch.
Key Terms You Need to Know
I want to clear up some industry jargon so you can shop for supplies with confidence. First, you’ll hear about stabilizers. These are backings that keep your fabric from puckering while you stitch. Then there are transfer pens, which come in temporary (water-soluble) and permanent versions. Always use temporary ink if you plan to wash the lines away later. Another critical concept for 刺繡圖案轉印 is mirror imaging. Since you’re pressing a design face-down during a heat transfer, you must print your artwork in reverse. Finally, remember the difference between tracing and printing. Tracing is manual and perfect for one-off art; printing is an automated process designed for speed and brand consistency.
DIY Methods for Transferring Designs at Home
I always tell beginners that you don’t need a factory to start creating. Most of my early projects began right at my kitchen table using simple DIY tools. While professional methods offer speed, mastering 刺繡圖案轉印 at home gives you total creative control over one-off pieces. I’ve found that the best method depends entirely on your fabric choice and how much detail you need to preserve. Here are the four primary ways I handle transfers at home:
- The Lightbox Method: This is my favorite for thin, light-colored fabrics. You simply shine light through your design and trace it directly onto the material.
- Heat-Transfer Pens: These allow you to draw a design on paper and iron it onto your fabric. It is like making your own custom stamp.
- Water-Soluble Stabilizers: I find this the easiest “print-and-stick” method for beginners. You print your design, stick it to the fabric, and stitch right through it.
- Carbon and Wax Paper: These are old-school but reliable. They work wonders on heavy materials where light cannot penetrate the fibers.
Using the Lightbox and Window Technique
If you don’t have a dedicated lightbox, a sunny window works just as well. I recommend taping your paper design to the glass first, then taping your fabric over it. This prevents shifting, which is the number one cause of distorted patterns. I use water-soluble pens for this because the lines disappear completely with a quick spritz of water. To keep your hand steady, try resting your elbow on a solid surface. Even professional embroidery techniques often rely on these fundamental tracing skills to ensure accuracy before the first needle drop.
The Magic of Water-Soluble Topping
For fabrics with a lot of texture, like fleece or chenille patches, tracing is almost impossible. That is where water-soluble stabilizers save the day. You can buy a pack of Clover brand transfer paper for around NT$132 to NT$138 per sheet as of April 2026. Just run it through your home inkjet printer, peel off the backing, and stick it to your fabric. Once your stitching is finished, soak the piece in lukewarm water. The film dissolves, leaving only your beautiful threadwork behind. It is a seamless way to handle complex 刺繡圖案轉印 without the stress of manual tracing. If you ever find yourself overwhelmed by the manual labor of tracing hundreds of designs, you might want to check out our custom services to see how we handle the heavy lifting for you.
For those working on a budget, Taiwanese embroidery transfer vinyl or a five-color pack of fabric carbon paper (priced at NT$60 in 2026) are great alternatives. These old-school methods are perfect for denim or canvas where a lightbox won’t help. Just remember to use a stylus or a ballpoint pen with firm pressure to ensure the wax transfers clearly. This simple step prevents the design from washing away before you’ve finished your last stitch.
Heat Transfer vs. Manual Tracing: A Professional Comparison
I often get asked whether it is better to trace a design by hand or use a professional heat transfer. It’s a classic debate in the maker community. I look at it this way: manual tracing is like a handwritten letter. It is personal, unique, and takes time. Professional heat transfer is the high-speed printing press of the embroidery world. For a single 刺繡圖案轉印 project, tracing is a great way to connect with your art. But the moment you need to scale, manual labor becomes a massive bottleneck.
Let’s look at the time investment. Tracing a complex design by hand usually takes about 15 minutes. If you are making 100 pieces for a local club, that’s 25 hours of sitting at a lightbox. By contrast, professional heat transfers allow you to apply the same design in seconds with perfect consistency. Small business owners need to value their time. If you spend 25 hours just tracing, you aren’t focused on growing your brand or finishing the actual stitching.
Detail retention is another huge factor. Heat transfers handle gradients and microscopic lines that a water-soluble pen simply cannot mimic. Modern industrial transfers bond with the fabric at a molecular level. They don’t just sit on the surface; they become part of the material. This durability means your guide lines won’t smudge or fade mid-stitch, even if the project takes weeks to complete. In my experience, the “pro” route is almost always the right choice when durability and precision are non-negotiable.
When to Stick with Manual Tracing
Sometimes, slow is better. I recommend manual methods for heat-sensitive fabrics like silk or vintage lace where a hot iron might cause permanent damage. It’s also the best choice for “slow stitching” projects where the meditative process is the entire goal. Interestingly, commercial embroidery transfer patterns became a staple of home artistry back in the 19th century for this very reason. Even complex 3D embroidery projects occasionally benefit from a manual hand-drawn guide to help place specialized foam layers with extreme accuracy.
The Power of Professional Heat Transfer Printing
If you want photo-quality results with zero distortion, heat transfer printing is the gold standard. Modern tech has eliminated the “stiff” feeling of old-school iron-ons. Today’s industrial transfers have a soft, breathable feel that integrates seamlessly with apparel. Brands choose this for high-volume runs because it guarantees that the 1,000th 刺繡圖案轉印 looks exactly like the first proof. It removes the human error of a shaky hand and replaces it with manufacturing precision.
My Pro Tips for a Flawless Design Transfer
I’ve learned that even the most expensive equipment won’t save a project if your technique is sloppy. Success with 刺繡圖案轉印 comes down to the small details you handle before the needle ever touches the cloth. I always start by performing a “patch test” on a scrap piece of my project fabric. Some synthetic blends react poorly to transfer inks, causing lines to spread like a watercolor painting. If you see bleeding on your scrap, you know you need to switch to a different pen or a stabilizer before ruining your main piece.
One of my non-negotiable rules is the “Dry Heat” rule. Most people leave their iron on the steam setting by default, but moisture is the enemy of a crisp iron-on transfer. Steam can cause the paper to buckle or the ink to blur. Use a dry iron on a firm, flat surface like a wooden table rather than a padded ironing board. This provides the resistance needed to push the ink into the fibers. For dark fabrics like navy or black, standard pens are useless. My secret weapon is white dressmaker’s carbon paper, which creates a bright, chalky outline that is easy to follow under any light.
Preparing Your Digital Artwork
When you’re preparing files at your computer, keep your lines high-contrast. I find that pure black-and-white artwork transfers much better than grayscale. If you’re using heat-based methods, you must “flip” your image horizontally before printing. This ensures that letters and logos face the right way once they are pressed onto the fabric. When you are ready to scale up and work with a custom patches manufacturer, always provide vector files like .AI or .PDF. These formats allow us to maintain perfect line weight regardless of the final patch size.
Troubleshooting Common Failures
If your lines appear too faint after a transfer, don’t try to “eye-ball” the rest. Use a water-soluble pen to carefully re-trace the ghosted lines while the image is still fresh. If your transfer shifts during the ironing process and creates a double image, you can sometimes remove the mistake. For most temporary inks, a cotton swab dipped in rubbing alcohol or a specialized ink remover will lift the mark without staining the fabric. Just remember to test a small area first. If you want to skip the stress of manual alignment, you can request a professional design proof and let my team handle the technical precision for you.
Scaling Up: Why Professional Transfers Win for Brands
I’ve seen many creators reach a tipping point where manual 刺繡圖案轉印 simply doesn’t make sense anymore. It usually happens when you move from making gifts for friends to fulfilling orders for a growing brand. At this stage, your time is your most valuable asset. Spending 20 minutes tracing a single design is fine for a hobby, but it’s a barrier to growth when you need 500 units. Professional transfers bridge this gap by turning your digital vector files into high-precision physical emblems in seconds. This move allows you to scale without sacrificing the detail that made your art popular in the first place.
The OEM process is designed for speed and total accuracy. We take your digital artwork and create a production-ready blueprint that ensures the 1,000th patch looks exactly like the first proof. This consistency is what builds brand trust. If you’re selling apparel, your customers expect the same quality every time they buy. By moving to professional manufacturing, you also unlock significant cost efficiencies. According to May 2026 market data, bulk orders can bring costs as low as $0.47 per patch. This is a massive shift from the higher per-unit cost of DIY materials like NT$138 transfer sheets or NT$1,200 beginner kits found on platforms like Pinkoi.
From DIY Hobbyist to Brand Owner
Transitioning your hand-drawn art into a production-ready file is the first step toward professional quality. I recommend using vector formats to ensure your lines stay sharp during the 刺繡圖案轉印 process. It removes the guesswork from manufacturing. Working with a partner who understands specialty custom patches means you don’t have to worry about technical hurdles like backing types or border styles. We take the complexity out of the equation so you can focus on the creative side of your business. It’s the fastest way to turn a weekend project into a legitimate revenue stream.
Why Better Emblem Company Ltd. is Your Perfect Partner
With over 45 years of experience in the textile industry, Better Emblem Company Ltd. has perfected the “Made Easy” philosophy. We handle the technical transfer and high-volume manufacturing so you can stay focused on design. We offer a fast 2, 3 week turnaround and high-end detail that DIY methods simply can’t match. Our process is transparent, efficient, and built on decades of reliability. We are also committed to sustainable, high-quality production, ensuring that your brand’s growth doesn’t come at an environmental cost. Ready to see your art come to life? Get a custom quote from us today!
Ready to Transform Your Designs into Reality?
I’ve spent this guide showing you how to bridge the gap between initial sketches and professional-grade needlework. Whether you’re a hobbyist or a brand owner, the precision of your 刺繡圖案轉印 is the single most important factor for success. We’ve covered everything from the “Dry Heat” rule to specialized tools for dark fabrics. This roadmap ensures your designs look exactly as you imagined without the stress of ink bleeding or fading lines.
Moving from manual tracing to industrial results doesn’t have to be a hurdle. It’s about working smarter to ensure every emblem meets high standards of detail. Since 1978, Better Emblem Company Ltd. has operated as a global manufacturing leader. We specialize in 3D, chenille, and heat transfer techniques, stripping away the complexity with all-inclusive pricing and no hidden fees.
Let us handle your bulk branding needs; get a quote for custom patches today! I’m confident that with the right transfer method and a reliable partner, your creative vision will translate perfectly onto any fabric. Let’s start building your brand together.
Frequently Asked Questions
How do I transfer an embroidery pattern to black or dark fabric?
Use white dressmaker’s carbon paper for a clear, chalky outline on dark materials. I find it much more reliable than standard tracing because the white lines pop against navy or black. You can also use heat-transfer pens specifically labeled for dark fabrics. These tools ensure your 刺繡圖案轉印 is visible under any lighting, saving you from eye strain during long stitching sessions.
Can I use a regular inkjet printer for heat transfer patterns?
You can use a regular inkjet printer, but you must buy specialized transfer paper like Clover brand water-soluble sheets. Standard printer paper won’t bond with fabric. As of April 2026, these sheets are widely available for about NT$138 per pack. Just print your design on the film side, stick it to your material, and start stitching. It’s a fast way to move digital art to a physical project.
Will the transfer ink wash out of my fabric after I finish stitching?
Most transfer inks are designed to wash out, but you should always check the label first. Water-soluble pens disappear instantly with a cool mist, while heat-transfer pencils might require a warm soapy soak. I always recommend a patch test on a scrap piece. If you use a permanent marker by mistake, those lines will stay forever. Always verify your ink type before you commit to the final 刺繡圖案轉印.
What is the best method for transferring very detailed, small designs?
The best method for tiny, intricate designs is the water-soluble stabilizer “print-and-stick” technique. It holds the fabric steady and prevents fine lines from blurring while you work. For even higher detail, professional heat transfers are the gold standard. They can handle microscopic gradients that are impossible to trace by hand. Brands often choose this for logo accuracy where every millimeter counts.
How do I stop my fabric from puckering during a heat transfer?
Stop fabric puckering by using a firm, non-padded surface and a high-quality stabilizer backing. If your fabric is too loose, the heat from the iron will cause the fibers to shrink or shift unevenly. I use a wooden table and a dry iron to ensure the pressure is distributed across the whole design. Keeping the fabric taut in an embroidery hoop after the transfer also helps maintain a flat surface.
Is there a way to transfer patterns to stretchy fabrics like t-shirts?
For t-shirts and stretchy knits, I recommend using a fusible stabilizer on the back before you transfer the pattern. This “freezes” the stretch so your design doesn’t distort while you trace or stitch. You can also use stretch heat transfer vinyls that are designed to move with the fabric. This prevents the design from cracking or peeling when the garment is pulled or worn during daily use.
Can I reuse a heat transfer pattern more than once?
Most transfer methods are one-time use, especially water-soluble films and carbon paper. However, some heat-transfer pencils allow for two or three light applications if the first press was quick. Each subsequent transfer will be significantly fainter than the first. For brand consistency and crisp lines, I always suggest using a fresh print or transfer for every single piece you create.
What is the difference between iron-on transfers and sublimation?
Iron-on transfers sit on top of the fabric fibers, while sublimation turns ink into gas to dye the fibers themselves. Sublimation requires a high-polyester content and creates a permanent, “no-feel” finish that never cracks or peels. Standard iron-ons are more versatile for cotton but can feel slightly stiff. For professional apparel, sublimation is the preferred choice for durability and vibrant, full-color results that last through hundreds of washes.