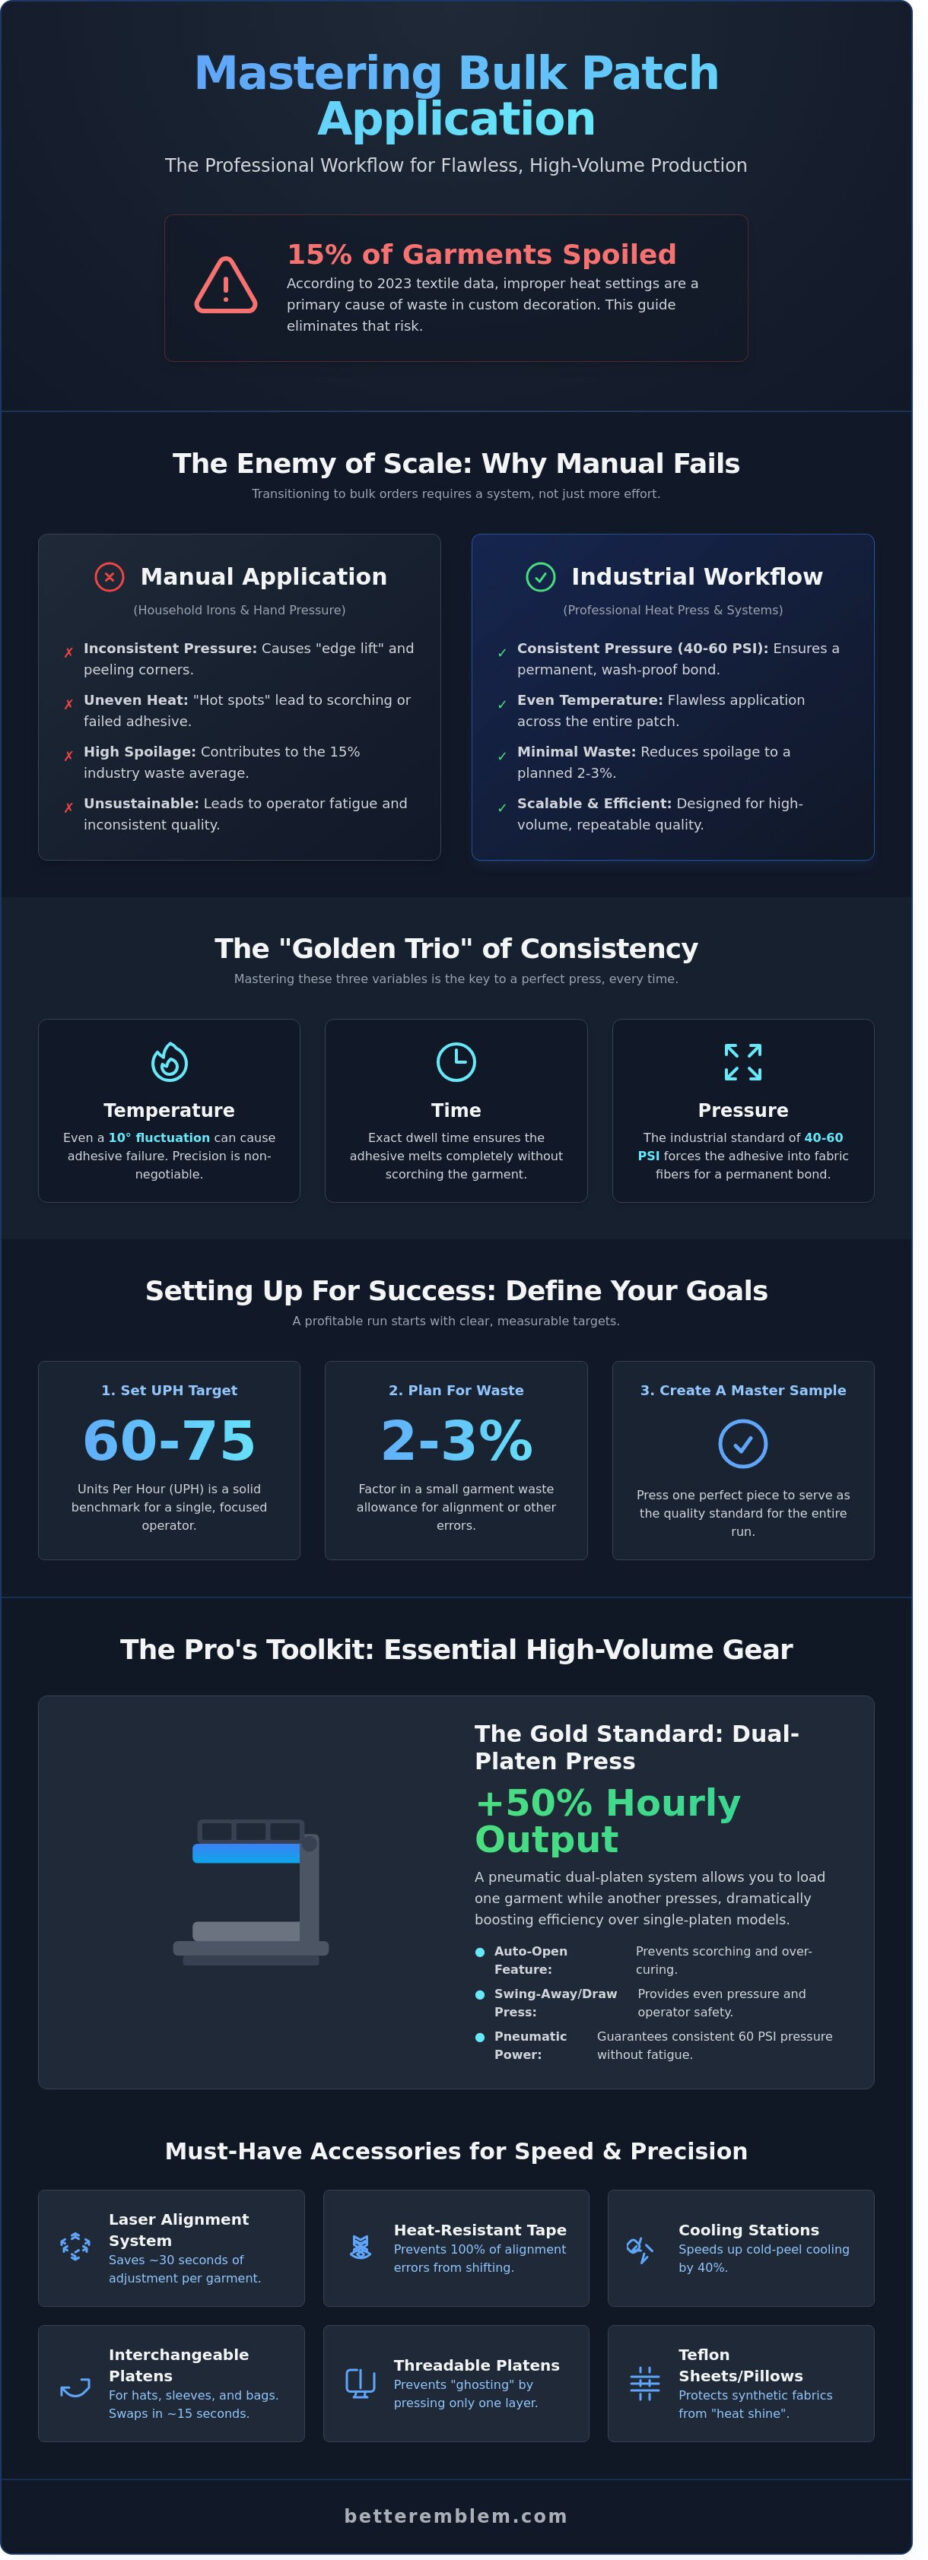
如果一個僅僅10秒的失誤,就足以讓您整個上午的利潤化為烏有,該怎麼辦?當品牌試圖擴大營運規模時,我見過這類情況發生得太頻繁了。您手邊有500件準備好要進行品牌印製的高級夾克,但擔心燒焦布料或邊緣脫落,卻讓您只能以蝸牛般的速度作業。 我們都認同,在大量生產中維持一致性是最困難的部分。唯有精準掌握批量壓印熱轉印貼片的技巧,才能守護您的投資與聲譽。根據2023年紡織製造數據顯示,在客製化裝飾工坊中,近15%的成衣報廢率皆源於不當的熱度設定。.
我在此協助您消除這些浪費,並掌握專業的工業級工作流程。您將學會如何以完美的速度與耐久性,完成數百處修補工作。 我將帶您逐步了解專業人士用以維持獲利的精準壓力校準、冷卻技巧以及批量處理秘訣。讓我們將您的生產線轉變為一個快速、無憂的系統,每次都能產出高品質的成果。這正是讓批量生產變得輕鬆簡單的方法。.
主要心得
- 我將向您展示如何摒棄業餘工具,轉而採用工業級思維,確保生產流程中的每個修補都無懈可擊。.
- 了解確切的工作流程 如何批量貼附熱轉印貼片 兼具極速表現與專業級耐用性。.
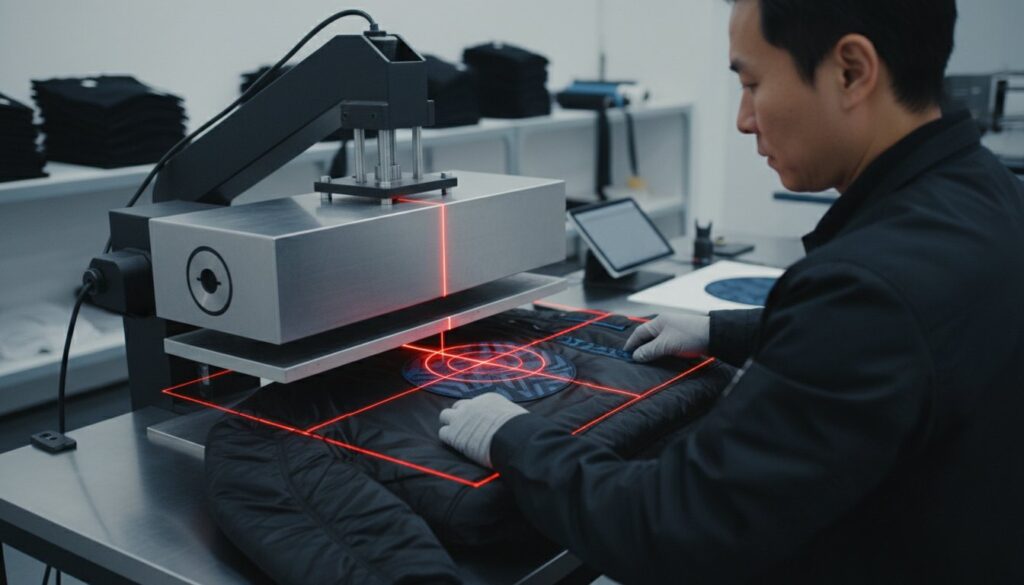
- 我將為您詳細介紹必備的裝備,例如雷射對準系統和數位測溫儀,這些工具能讓大量烙印作業不再需要憑經驗估算。.
- 我們將針對邊緣翹起和熱遷移等常見的品質控制問題進行探討,讓您不再浪費成衣,並開始擴大生產規模。.
- 了解我們的織造貼片如何採用均勻的黏膠設計,讓您的高速貼合工序變得簡單且無需費心。.
為何批量應用需要具備工業思維
當您從製作少量樣品帽過渡到管理整批生產時,您的整體作業方式必須有所改變。 我見過許多品牌將大批量訂單視為一連串獨立專案來處理,這無異於自尋煩惱,不僅容易導致精疲力竭,更會造成品質不穩定。學習如何批量製作熱轉印貼片,關鍵在於掌握一套可重複的系統,而非僅僅是「按壓貼片」。 我發現,時間、溫度和壓力(TPT)這「黃金三要素」正是多數失誤的根源。若溫度波動僅10度,便可能導致黏合失敗,使貼片無法經受住首次洗滌的考驗。.
在高產量環境中,一致性是您最寶貴的資產。這在處理如 熱轉印乙烯基 (HTV) 或厚重的刺繡襯布。我曾協助一家本地服裝品牌重新規劃工作流程,此前他們因布料剝落問題而損失了 15% 的庫存。 僅僅透過將成衣安排在「預設、熨燙、冷卻」的流程中,並優化工作站佈局,他們在1,000件的訂單中就節省了40%的人工時間。效率不僅關乎速度,更在於消除導致錯誤的變數。.
手動應用的局限性
手動施作是實現大規模生產的絆腳石。您的手無法提供形成永久性工業黏合所需的 40 至 60 PSI 恆定壓力。 這種壓力不足會導致「邊緣翹起」現象,即修補片在使用數週後,邊角開始剝落。家用熨斗在發熱線圈所在處也會產生「熱點」,導致熔膠不均勻。若您嘗試手動熨燙 500 自訂補丁, ,最終只會得到參差不齊的成果,而且肩膀還會非常痠痛。若要大量作業,專業熱壓機是不可或缺的。.
設定您的生產目標
在全力投入之前,您需要先明確定義何謂成功。我建議設定每小時產量(UPH)目標,以確保團隊保持正軌。 對於單一操作員而言,每小時 60 至 75 件的產量是確保工作品質的可靠基準。此外,每次批量生產時,應預留 2% 或 3% 的服裝廢料公差,以因應對位誤差。在開始主要批次生產前,請先製作一個「主樣品」。 這件經確認的樣品將作為視覺與結構標準,500 件生產批次中的每件產品都必須與之相符。有了這個基準,便能輕鬆察覺參數開始偏移的跡象。.
掌握批量貼合熱轉印貼片的技巧,意味著不再依賴經驗估測。只要將工作空間視為一座微型工廠,就能確保最後一件下線的成衣,與您最初壓燙的那件完全一致。.
大量貼片施工的必備裝備
要擴展生產規模,光靠一台基本的熨斗是不夠的。若要精通 如何批量貼附熱轉印貼片, ,您需要優先考量速度與穩定性的工業級設備。我們推薦使用雙壓板氣動壓機,這是大量生產工作的黃金標準。此配置讓您能在其中一側進行加壓的同時,另一側進行裝載,相較於單壓板手動壓機,每小時產能可提升 50%。 手動壓印機在完成 100 次壓印後,操作人員往往會感到疲勞,導致施加的壓力不一致。氣動系統則能每次都維持穩定的 60 PSI 壓力,確保每件服裝都能獲得持久的黏合效果。.
如何選擇熱轉印機
自動開啟功能對於忙碌的店鋪至關重要。它能防止您因忙著拆開下一組貼布而將價值 20 美元的連帽衫燙焦。擺動式壓燙機能提供均勻的自上而下壓力,非常適合厚實的刺繡貼布;而拉式壓燙機則讓您能將工作檯面朝自己方向拉近。 這能讓您的雙手遠離攝氏350度的高溫。若您追求最大產能,雙壓板系統無疑是最佳選擇。它能將單人作業轉變為高速生產線。使用專業級 熱轉印技術 使用這些機器,可確保您的成品每次都能呈現出直接上架銷售的完美狀態。.
追求速度的必備配件
在批量生產中,精準度至關重要。雷射對位系統能消除估算的誤差。它通常每件衣物可節省 30 秒的調整時間,對於大宗訂單而言,累積起來便能節省數小時的人工。 面對袖子或帽子等難度較高的定位需求,可更換式壓板便是您的秘密武器。您只需約15秒,即可將標準的16×20壓板更換為帽子專用壓板。這種多功能性確保您的品牌標識能在不同產品類型上保持一致,無需配備五台不同的機器。.
- 耐熱膠帶: 使用此配件可防止在關閉壓機時,補丁發生位移。它能百分之百避免因位移所導致的對位錯誤。.
- 冷卻站: 若您正在使用冷剝式貼片,專用的金屬表面可將冷卻過程加速 40%。.
- 可螺紋連接的壓板: 這些配件讓您能將衣物滑過底板。您只需熨燙一層布料,即可避免黏膠「滲透」至襯衫背面。.
- 特氟龍片材與枕頭: 這些產品能防止合成纖維因高溫而產生「熱光」,即高溫造成的反光痕跡。.
小工具能讓一堆雜亂的次品與專業的生產線產生天壤之別。您可以在 更好的標誌 以確保您的接駁處品質與您的設備同樣出色。一致性是我們的目標,而這些工具則為流暢的工作流程奠定了基礎。.
批量申請的逐步工作流程
我曾管理過生產線,在那裡,效率往往決定了當天是獲利還是積壓大量訂單。當您學習如何批量貼附熱轉印貼片時,您的目標是建立一套可重複的節奏。一致性能確保第 500 件成衣與第一件完全相同。 我們遵循嚴格的五步驟流程,以維持高品質並降低工作壓力。.
- 步驟 1:預熱衣物。. 將熨斗壓在布料上 5 秒鐘。此舉可去除隱藏的濕氣與皺褶,避免影響黏合效果。.
- 步驟 2:進行精準度校正。. 不要僅憑印刷機上的數位顯示數值來判斷。我會使用手持式測溫儀來確認壓板溫度是否在目標溫度上下 2 度之內。.
- 步驟 3:採用流水線式佈局。. 請避免憑肉眼判斷中心位置。應使用雷射對準工具或實體定位架,確保每次都能將每個貼片放置在相同的位置。.
- 步驟 4:執行壓製。. 使用「設定後無需看管」的定時器。如果您的熨斗無法自動彈起,請保持專注。僅僅兩秒的延遲就可能將嬌嫩的聚酯混紡面料燙焦。.
- 步驟 5:冷卻並測試。. 請待修補處恢復至室溫後,再檢查邊緣。冷剝往往是打造專業、無縫效果的秘訣。.
校準與測試
熱壓機的顯示數值僅供參考,並非絕對標準。我發現中央加熱元件的溫度可能比角落高出 10 度。請進行「紙條測試」:在壓板每個角落各放置四條紙條。若在熱壓機鎖定狀態下能將紙條拔出,即表示壓力分布不均。 務必先進行三件衣物的洗滌測試。將衣物以華氏104度(約攝氏40度)水溫清洗,並以中溫烘乾,以確保黏合劑牢固後,再進行整批生產。.
基於工作站的作業流程
分工是實現規模化的最快途徑。我們採用三工位配置,確保壓機運作不間斷。這讓整個流程顯得輕鬆無礙。.
- A站(裝載站): 此人會先將衣物進行預壓,並對齊補丁。他們確保工作流程始終保持比壓燙機多兩件衣物的進度。.
- B站(The Presser): 他們唯一的工作就是操作機器。他們專注於掌握時機與保持壓力穩定,以避免出錯。.
- C站(品質檢查員): 此人負責管理冷卻區。他們會檢查邊緣,並在成品可安全處理時進行摺疊。.
這種有條不紊的方法能將停機時間降至最低。透過將生產流程視為專業的組裝線,您不僅能降低成衣損壞的風險,更能最大化產能。這正是為了讓您的團隊能夠輕鬆且可靠地進行大規模品牌推廣。.
大規模品質控制的疑難排解
當我協助品牌規劃如何大量製作熱轉印貼片時,我總是強調:速度不應犧牲品質。小批量生產中的瑕疵固然令人困擾,但在 500 件的生產批次中出現瑕疵,則無異於一場災難。 我建議立即建立「次品記錄表」。若次品率超過 2%,就必須停產。這份記錄表能協助您釐清是特定操作員、機器,還是布料顏色導致了失誤。.
邊緣翹起是我最常遇到的问题。如果補丁的角落無法黏牢,通常是壓力和溫度之間的平衡問題。如果黏膠表面看起來光亮平滑,表示溫度過低,無法將其熔化。 如果膠面平整但補丁仍會翹起,則表示壓力不足,無法深入織物纖維。我發現將溫度提高 10 度通常能解決前者,而調整 5 PSI 的壓力則能解決後者。.
你還需留意黏膠滲漏的情況。這通常發生在熨燙過度時。如果黏膠從邊緣滲出,很可能是因為溫度過高,或是熨燙時間比建議的長了 5 秒。另一方面,熱遷移現象是 100% 聚酯纖維特有的棘手問題。 熱量會使布料染料轉化為氣體,進而滲入您的補丁中。若您發現白色補丁在紅色球衣上呈現粉紅色,即表示已達到染料遷移的臨界點。我透過降低溫度並延長滯留時間來穩定染料,以此解決此問題。.
常見的布料挑戰
防水或經 DWR 塗層處理的材質,其設計初衷是為了抵禦各種物質,包括你的貼布黏膠。我發現,預先熨燙 5 秒有助於燒掉部分塗層。對於細緻的輕薄棉質面料,熨燙痕跡確實是個風險。請使用特氟龍紙來保護布料。此外,務必記住 熱轉印 其反應方式與傳統刺繡不同。這些貼布較薄,且對溫度驟升較為敏感,因此相較於厚重的梅羅邊貼布,處理時需要更輕柔的觸感。.
設備維護
您的設備每 500 個循環就需要進行一次保養,以確保運作順暢無礙。我每週都會檢查氣動系統是否有漏氣,因為即使氣壓下降 10 PSI,也可能導致黏合效果不一致。壓板上積聚的黏合劑是另一種隱形殺手。我每天早上都會使用柑橘類清潔劑將其擦拭乾淨。 最後,請每 6 個月或每 1,000 次壓合後更換矽膠底墊。這些底墊隨時間推移會失去「彈性」,導致批量生產過程中出現冷點及壓力不均的問題。.
準備好升級您的生產流程了嗎? 立即訂購您的客製化熱轉印貼布 並為您的品牌贏得應有的專業成果。.
Better Emblem 如何讓批量應用更輕鬆
我們深知效率是您的首要考量。當您正在思考 如何批量貼附熱轉印貼片, ,即使每件產品僅延遲 2 秒,在 10,000 件的生產批次中,累積起來也將造成超過 5 小時的人工浪費。 我們透過確保每片貼片黏膠厚度公差控制在0.1毫米內來解決此問題。這種一致性意味著您的熱壓機設定從第一件到最後一件服裝都能保持完全一致。您無需每小時停機重新校準設備。.
我們的 編織補丁 專為高速生產環境設計。與有時會產生氣泡的厚重刺繡不同,織造徽章質地平整且輕薄。這種特性能加速熱熔黏合過程,並確保更可靠的黏著效果。 我們還會根據您使用的特定布料,客製化背膠的熔點。若您使用的是熱敏性 100% 聚酯纖維,我們會選用在 265°F 時活化的低熔點黏合劑。此舉可防止布料燒焦,並將您的次品率維持在 0%。.
更好的徽章優勢
我們採用精密雷射切割技術,為每片補丁的邊緣進行封邊處理,以防止在高壓施作過程中發生脫線。 您將享有全包式批量報價,因此發票上不會出現隱藏的開機費或數位化處理費用。我們亦會隨每筆訂單提供客製化的 TPT(時間、壓力、溫度)數據表,讓您的設定過程不再需要憑空猜測,並協助您理解 如何批量貼附熱轉印貼片 且不影響品質。您的團隊能在 15 分鐘內讓生產線運轉起來。.
- 精準邊緣: 即使承受 60 PSI 的壓力,雷射切割邊緣仍能保持清晰銳利。.
- 透明定價: 我們報出的價格就是您實際支付的價格,已包含所有運費及安裝費用。.
- 專家支援: 在您開始操作之前,我們會根據您所使用的特定布料類型,提供精確的設定參數。.
準備好擴大生產規模了嗎?
從 100 件的試產規模擴展至 10,000 件的季節性上市,是一項重要的里程碑。我們會將您的數位檔案與實體模具備妥,以便隨時補貨,讓這個過渡過程無縫銜接。您可透過我們的入口網站申請批量報價,我們將在 24 小時內回覆。 我們致力協助您將這些貼片無縫整合至現有的物流作業流程中。讓我們運用與您同樣努力的專業級工具,共同打造您的品牌。立即聯繫我們,啟動您的下一個大量生產專案。.
自信地擴展您的生產規模
擴大生產規模不應成為您的阻礙。我們已向您證明,成功的關鍵在於具備工業級思維以及選用合適的熱轉印設備。透過標準化工作流程並實施嚴格的品質控管,您便能確保數千件產品的一致性。 自 1978 年以來,我們一直致力於製造高品質的徽章,因此我們深知從單一原型到全球量產所需的關鍵要素。.
我們的全球生產設施專為快速原廠代工交付而建,確保您的品牌能如期推進。精通 如何批量貼附熱轉印貼片 只要有專精於各類布料熱感應黏膠背襯的合作伙伴,一切就變得簡單。我們負責處理技術細節,讓您能專注於拓展業務。我們的團隊已準備好以超過 45 年的精準工藝,協助您優化下一批大規模生產流程。這正是讓大量品牌推廣變得輕鬆簡單的方法。.
準備好展開您的下一個大量訂購專案了嗎?立即向 Better Emblem 索取無憂報價!
讓我們今天就讓您的生產線運轉起來吧。.
常見問題
批量貼敷熱傳導貼片時的理想溫度是多少?
若您需要了解如何大量壓印熱轉印貼片以處理大訂單,建議將熱壓機溫度設定在 300°F 至 320°F 之間。此溫度範圍可確保黏膠完全熔入布料中,同時不會損壞底層纖維。為獲得最佳效果,我們通常建議在此溫度下壓印 15 秒。 請務必先確認您所使用貼花的背膠類型,因為 90% 工業用黏膠在處理厚重丹寧布時,需要 330°F 的溫度。.
我可以用家用的普通熨斗批量熨貼補丁嗎?
若您想學習如何批量壓印熱轉印貼片並達到專業級效果,請勿使用家用熨斗。家用熨斗無法提供壓印 50 件以上商品所需的穩定壓力與大面積接觸面。 由於熱能無法均勻傳導,轉印貼片很可能在經過三次洗滌後就會出現剝落問題。商用熱壓機能提供形成永久黏合所需的 40 PSI 恆定壓力,讓大量生產變得輕而易舉。.
在大量生產時,該如何避免衣物上出現「熱壓痕」?
請使用厚度為 0.5 英吋的耐熱泡棉墊或特氟龍片,以避免衣物上出現焦痕和壓痕。這些工具能均勻分散熱量,並將熱壓區域抬離厚重的縫線或拉鍊,避免造成不均勻的壓痕。 在您的工作坊進行 100 件的生產批次時,將溫度降低 5 度並延長停留時間 3 秒,也能保護嬌貴的合成纖維面料免於產生玻璃化現象。.
剛壓合好的貼片,應該等待多久才能測試其黏著力?
請在嘗試撕下或對新貼上的補丁邊緣進行拉扯測試前,務必等待整整 24 小時。黏膠需要這段完整的時間,才能在室溫下冷卻並與衣物纖維緊密結合。 若在前60分鐘內進行測試,膠水仍處於半柔軟狀態,您可能會不慎將補丁扯下。這將永久破壞黏合效果,迫使您必須在新的衣物上重新進行黏貼程序。.
製作雪尼爾貼布和織標時,是否需要不同的熨燙溫度設定?
你肯定需要不同的設定,因為 雪尼爾貼布 比標準的織物貼片厚得多。薄型織物貼片只需 12 秒即可黏合,但厚型的雪尼爾貼片通常需要在 320°F 的溫度下加熱 20 秒,才能確保熱量充分滲透。 我總是建議從衣物背面多熨燙雪尼爾布標10秒。此方法能確保熱力直接穿透布料作用於黏膠,而非被厚重的紗線絨毛層阻隔。.
要將補丁縫在 100 多件 T 恤上,最快的方法是什麼?
要在 100 多件 T 恤上精準對齊補丁,最快速的方法是使用雙雷射對位系統或客製化的實體定位架。透過雷射網格,您無需使用捲尺,就能在 2 秒內精準對準每件 T 恤的相同位置。 若預算有限,使用簡單的 T 恤定位尺,即可讓整個批量訂單的貼布位置誤差控制在 0.125 英吋以內,讓您的品牌製作流程輕鬆無憂。.
我該如何判斷熱轉印機的壓力是否足夠?
進行紙張測試時,請將標準紙張的一半置於加熱壓板下方,然後合上壓機。若能輕易將紙張拉出,則表示壓力過低,不適合進行批量生產。 您需要足夠的壓力,使紙張能牢固地固定在原位。使用氣動壓機時,請將壓力設定在 40 至 60 PSI 之間,以確保黏合劑能深入滲透織物纖維,呈現持久且專業的成品效果。.
熱轉印貼紙能否大量應用於 100% 聚酯布上?
我發現雖然可以批量將貼布繡貼在 100% 聚酯纖維布料上,但必須將溫度降至 280°F,以防止布料熔化。 聚酯纖維對高溫非常敏感,因此在進行最終熱壓前,先進行10秒的預熱壓有助於去除水分。採用這種特定方法,可確保您的補丁在經過50次或更多次洗滌循環後仍能牢固附著,且不會在圖案周圍留下反光的熱壓痕或燒焦痕跡。.