Your logo isn’t just a piece of art; when you choose 3D puff, it becomes a physical construction project where the foam always gets the final vote. I know how frustrating it is to submit a design you’re proud of only to have it rejected because the text is too small or the lines are too thin. It’s even worse when you spend money on a bulk order and the results come back looking like an unprofessional “blobby” mess. Understanding 3d embroidery design limitations is the only way to avoid these hurdles and ensure your investment pays off.
I’ve seen many creators struggle with these technical boundaries, but I’m here to simplify the process for you. I will walk you through the specific rules of 3D puff embroidery so you can design premium patches that work perfectly on the production line. We’ll look at the exact specs you need, how to use hybrid techniques for complex logos, and why machines must run 25% to 40% slower to get that perfect raised finish. By the end, you’ll have a clear checklist and the confidence to place a bulk order that looks exactly the way you imagined.
要点
- I’ll show you how EVA foam dictates your design structure and why every stitch must wrap completely around it to hide the “puff” underneath.
- You’ll learn to master the 3mm column width rule to ensure your 3d embroidery design limitations don’t lead to messy, rejected artwork.
- I’ll explain why sharp 90-degree corners are a risk and how the “capping” technique creates the clean, professional finish you’re looking for.
- You’ll discover the hybrid approach, which mixes flat stitching with 3D elements to keep your fine details sharp while maintaining that bold, raised look.
- I’ll share how we’ve used our expertise since 1978 to help customers tweak their logos for perfect production every time.
Understanding the Physics: Why 3D Embroidery Has Limits
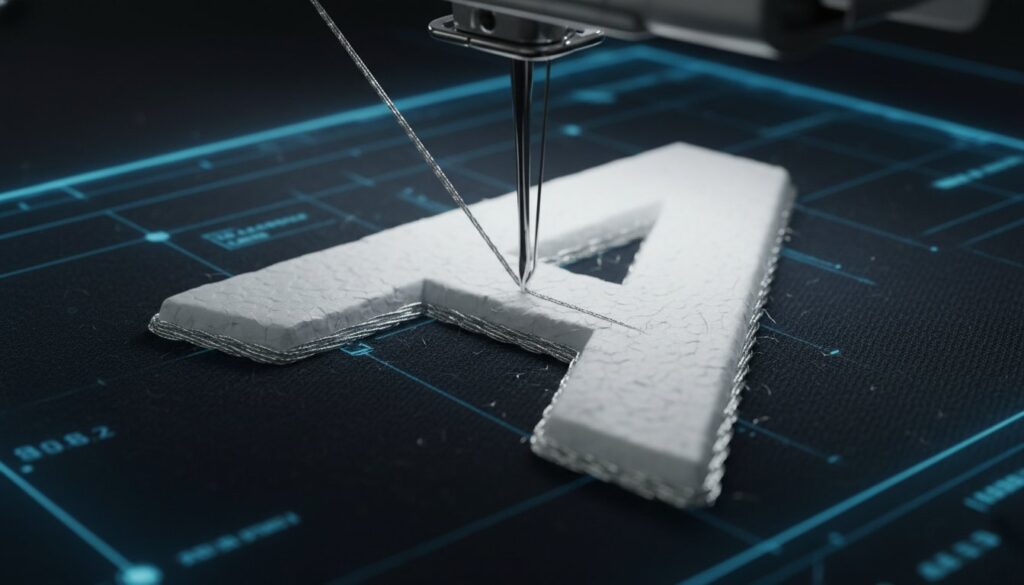
I’ve found that many clients expect 3D embroidery to work just like a standard flat design, only thicker. In reality, it’s a structural construction project. When I create a 3D patch, I’m not just using more thread. I’m actually building a “bridge” over a piece of foam. To do this successfully, I have to respect the physical rules of the craft. Understanding the Physics: Why 3D Embroidery Has Limits is the first step toward getting a result you’ll love. If I try to force a needle through too much material or place stitches too close together, the thread breaks or the foam gets mangled. Physics always wins in the embroidery room.
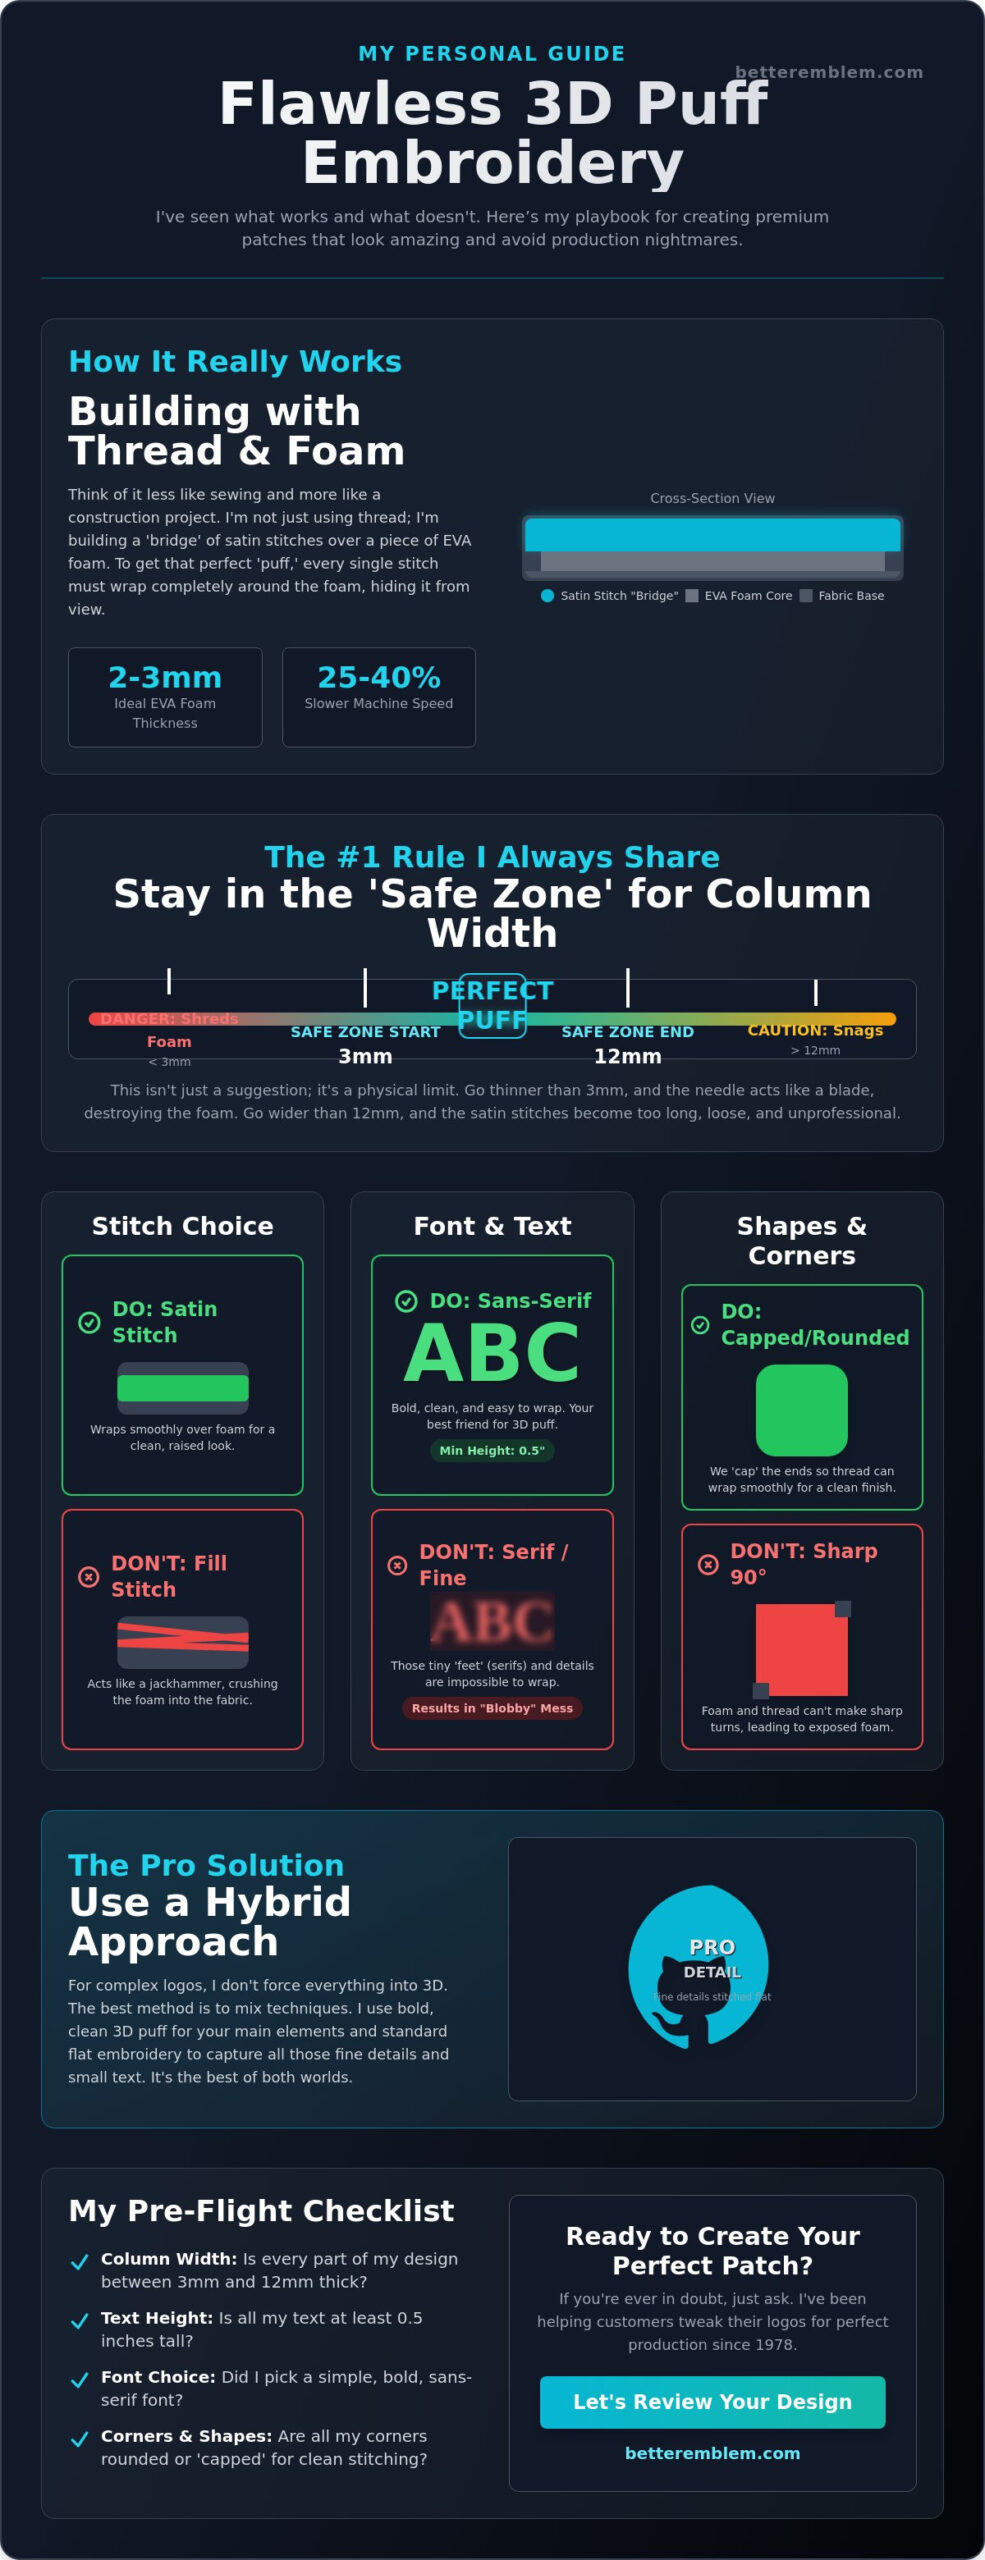
The “pop” you see on a premium cap or patch comes from the tension between the thread and the foam. I have to dial in the stitch density perfectly. If the stitches are too loose, the foam isn’t compressed enough and looks sloppy. If they’re too tight, the needle creates so many holes that the foam simply disintegrates. I also have to slow the machines down by 25% to 40% compared to standard flat work. This slower speed ensures the needle penetrates the foam cleanly without snapping the thread under the extra pressure. These 3d embroidery design limitations aren’t meant to hold you back; they’re the guardrails that keep your design looking professional.
The Role of EVA Foam
The secret ingredient in every 3D design is EVA foam. I typically use foam that ranges from 2mm to 3mm in thickness. This provides the ideal balance of height and stability. The foam must be firm enough to stand up under the pressure of the thread but soft enough to be perforated by the needle. If the foam is too hard, it can actually deflect the needle, causing “skipped” stitches. One common hurdle I see is “ghosting.” This happens when the foam color doesn’t match the thread color. If I use white foam under a navy blue design, tiny specs of white might peek through the thread. I always suggest matching the foam to your thread to ensure a seamless, high-end finish.
Satin Stitches vs. Fill Stitches
I almost exclusively use satin stitches to achieve a 3D effect. A satin stitch “wraps” the foam by jumping from one side of a shape to the other. This creates a smooth, rounded surface that looks great. However, there is a limit to how wide a satin stitch can be. If a shape in your logo is wider than about 12mm, the stitch becomes too long and loose. It will snag on things and look unprofessional. On the other hand, fill stitches are a no-go for 3D. Because fill stitches consist of many small, overlapping movements, they simply crush the foam into the fabric. If you want that iconic “puff,” you have to stick to satin-based shapes and respect the width limits of the machine.
The Hard Limits: Size, Detail, and Small Text
I’ve seen countless designs hit a wall because they ignore the hard physical limits of the needle and thread. When you’re working with puff, your biggest enemy is trying to be too intricate. The golden rule I always share is that your minimum column width must be at least 3mm (1/8 inch). If your lines are thinner than that, the needle won’t have enough room to wrap the thread securely around the foam. Instead, the needle acts like a serrated blade and shreds the material. These 3d embroidery design limitations aren’t just suggestions; they are the boundary between a premium patch and a production disaster.
Small text is the leading cause of 3D design failure. I generally advise against any lettering under 0.5 inches in height. When you go smaller, you hit the “closing up” problem. Think about the tiny loops in letters like “e,” “a,” or “o.” In a 3D setup, the thread is so thick and the foam so bulky that these tiny holes simply disappear. Your brand name ends up looking like a row of solid, unreadable blobs. Spacing between your elements is just as vital as the thickness of the lines. You need enough “air” between letters so the foam can expand without merging adjacent parts of your logo into one giant lump.
Minimum Line Thickness Requirements
I recommend staying within the 3mm to 12mm “Safe Zone” for 立体刺繍. When a line drops below 3mm, the needle pierces the foam so many times in a small area that the foam loses its structural integrity. It won’t “pop” because there’s nothing left to hold the thread up. I suggest using 3D only for the boldest, most blocky elements of your artwork. If you’re worried your current logo might be too thin, you can always ask us to take a look before you commit to a full order.
The Problem with Serifs and Fine Details
Sans-serif fonts are your best friend for 3D patches. Fonts with consistent widths are much easier to digitize and produce. Serifs, those little decorative “feet” on fonts, are a major risk. They often end in sharp points that are impossible to wrap with foam. Because the thread has to cover the foam completely, these sharp points usually come out looking rounded or blunt, which can make your logo look distorted. I often help clients simplify their logos specifically for 3D by removing these fine details. Following established 3D puff embroidery guidelines ensures your final product looks sharp and intentional rather than like a mistake.
Shape Complexity: Why Sharp Corners Fail
I often tell my clients that a great 3D design isn’t just about thickness; it’s about how the shapes flow. While flat embroidery handles sharp angles with ease, 3D puff is much more sensitive. If you have sharp 90-degree corners in your logo, you’re likely to run into trouble. The needle has a hard time “sealing” those points because the foam is trying to expand outward while the thread is trying to pull it down. This struggle is one of the most common 3d embroidery design limitations I deal with daily. When the needle can’t quite cover the edge, the result looks unfinished and messy.
To fix this, I use a technique called “capping.” Instead of just running a single satin stitch to the end of a line, I digitize a small horizontal bar at the tip. This acts like a lid on a box, holding the foam inside so it doesn’t spill out the sides. Without these caps, the ends of your letters or shapes will look frayed. It’s a small technical detail, but it’s what separates a professional patch from one that looks like a DIY project gone wrong. I always look for these opportunities to “tweak” a design during the digitizing phase to ensure it actually works in production.
You might notice that rounded corners and organic, flowing shapes actually look more “3D” than jagged ones. Curves allow the thread to wrap the foam evenly, creating a consistent, bold profile that catches the light perfectly. I also recommend avoiding overlapping 3D elements whenever possible. You can’t easily stack puff on top of puff. If one 3D line crosses another, the second layer will simply crush the first one. It creates a messy, uneven surface that ruins the premium aesthetic. Sticking to single-layer raised elements is the best way to keep your brand looking sharp.
The “Foam Peek” Phenomenon
When the needle can’t perfectly seal a sharp corner, you get “foam peek.” This is exactly what it sounds like; the EVA foam becomes visible through the thread. This issue is even more obvious if you choose high-contrast colors. For example, using white thread over black foam is a recipe for disaster. Any tiny gap in the stitching will stand out immediately. I always suggest matching your foam color to your thread color as closely as possible. This simple step hides the physical 3d embroidery design limitations and keeps the focus on your logo’s height and texture.
Managing Intersecting Lines
When two 3D lines meet, they fight for space. The “crush factor” is a physical reality in the embroidery room. The pressure from the needle on the second pass will flatten the foam from the first pass, leaving a dent in your design. To keep your intersections clean and maintain that high-profile look, I suggest leaving a 1mm gap between separate 3D elements. This tiny bit of breathing room allows the foam to expand fully in both sections. It keeps your brand’s definition sharp and ensures every part of the logo maintains its intended “pop.”
Designing Around Limits: The Hybrid Approach
I’ve found that the best way to beat 3d embroidery design limitations is to stop thinking of your project as an “all-or-nothing” choice. You don’t have to pick between a flat patch and a 3D one. Instead, I suggest a hybrid approach. This strategy uses standard flat embroidery for the intricate details and saves the 3D puff for the “hook” of your design, like a central icon or a bold initial. It’s the secret to creating カスタムパッチ that look professional without sacrificing your brand’s fine details.
A technique I use often is creating a “border” of flat stitching around a 3D center. This flat stitching acts as a foundation, stabilizing the foam and preventing it from shifting during the production run. This foundation keeps the edges crisp and prevents the foam from “wandering” into areas where it doesn’t belong. If your logo has small taglines or thin decorative lines, I’ll digitize those in flat thread. For details that are just a bit too small for foam but still need some texture, I use “faux 3D.” This involves a heavy thread buildup that creates a slight lift without needing the bulky EVA foam. It gives you the best of both worlds.
When to Go Flat vs. When to Go 3D
My general rule of thumb is simple: small text stays flat, while large icons go 3D. If your lettering is under half an inch tall, 3D will likely fail. By keeping that text flat, you ensure it remains legible. You can also use color gradients in the flat sections to add depth that complements the raised 3D elements. This is why the hybrid approach is the gold standard for professional sports team hats. They use a massive 3D logo on the front but keep the smaller side logos flat to maintain clarity. If you’re ready to see how this works for your brand, start your custom project with us today.
Digital Mockups vs. Physical Reality
I need to be honest about one thing; your PDF proof will never look exactly like the final 3D stitch-out. A screen is flat, but a 3D patch is a physical object that interacts with light and shadow. When you look at a digitized file, you can see where the foam sits, but you can’t feel the tension. Reading a digitized file is a skill; look for the heavy “underlay” stitches that pin the foam down before the final satin wrap goes over the top. For bulk OEM orders, I always recommend a physical sample. It’s the only way to see how the thread wraps the foam and how the colors truly pop. This step removes the guesswork and ensures you’re 100% happy before we hit full production.
Partnering with Better Emblem Company Ltd. for Your 3D Designs
I’ve spent a lot of time explaining the technical side of things, but you don’t have to tackle these rules alone. Better Emblem Company Ltd. has been perfecting the art of the 3D patch since 1978. I’ve seen every type of logo imaginable, and I know exactly how to guide you through the process. I’ve seen many clients feel overwhelmed by 3d embroidery design limitations, but my job is to act as your expert facilitator. I’ll help you strip away the complexity so you can focus on the creative side of your brand while I handle the manufacturing hurdles.
Our global production facilities give us a massive advantage in the industry. I can source the specific density of EVA foam and high-tensile threads that standard shops simply can’t access. This ensures your 3D puff has the perfect “pop” without the thread snapping or the foam collapsing. My commitment to high-volume OEM quality means that every patch in your 5,000-unit order will look exactly like the first one. We maintain strict consistency because we understand that your brand’s reputation depends on the quality of the gear you put out into the world.
Our Professional Design Review Process
Every 3D order I handle starts with a comprehensive technical art review. I don’t just look at your file and say “no” if it doesn’t meet the specs. Instead, my team of expert digitizers will help you “tweak” your logo to fit 3d embroidery design limitations without losing your brand identity. We might suggest widening a column by a fraction of a millimeter or rounding a sharp corner to prevent foam peek. Once the stitching is done, I ensure the foam is perfectly trimmed and heat-treated for a clean, retail-ready finish that looks professional from every angle.
Ready to Start Your 3D Project?
I focus on making high-end manufacturing accessible for growing brands. Our tiered pricing models make 3D embroidery affordable for global brands looking to place bulk orders. You can submit your artwork to me today for a free technical feasibility check. I’ll review your lines, text size, and shape complexity to give you an honest assessment of how it will perform on the machine. This transparency builds immediate trust and ensures there are no hidden surprises when your order arrives. Let’s build your premium 3D patches today.
Elevate Your Brand with Premium 3D Patches
I’ve shared how to navigate the technical world of foam and thread. By respecting the 3mm rule and choosing bold, blocky shapes, you turn potential 3d embroidery design limitations into a roadmap for success. Remember that a hybrid approach often yields the best results for complex logos; it gives you the texture of puff and the clarity of flat stitching in one design.
I’ve been refining these manufacturing techniques since 1978, focusing on high-volume OEM production that meets the strictest quality standards. You don’t have to guess if your art will work because expert technical design support is included with every order. When you’re ready to see the difference that professional expertise makes, you can request a wholesale quote for your custom 3D patches.
Your vision deserves a physical product that matches your ambition. Let’s work together to create something your customers will be proud to wear.
よくある質問
What is the minimum font size for 3D embroidery?
I recommend a minimum font height of 0.5 inches (12.7mm) to ensure your text stays legible. Anything smaller than this often results in the “closing up” problem I mentioned earlier, where the loops in letters like “e” or “a” disappear completely under the thick thread and foam. Keeping your text bold and appropriately sized is the best way to maintain a professional look.
Can I do 3D embroidery on thin fabrics like t-shirts?
No, you should avoid using 3D puff on lightweight or stretchy fabrics like standard t-shirts. The high stitch tension and the weight of the EVA foam will cause thin fabrics to pucker, pull, or even tear during production. I always suggest sticking to structured items like caps, heavy hoodies, or thick jackets to provide the necessary support for the raised design.
Why is my 3D embroidery showing the foam underneath?
This “foam peek” usually happens when your stitch density is too low or your foam color doesn’t match your thread. If the satin stitches aren’t placed closely enough together, the foam becomes visible through the gaps. To fix this, I ensure our digitizers use a high density setting and match the foam color to the thread as closely as possible to hide the material underneath.
Can any logo be converted into a 3D puff design?
Not every logo is a candidate for this style because of specific 3d embroidery design limitations regarding fine detail and line thickness. Logos with complex gradients, tiny taglines, or very thin lines often need to be simplified. I usually recommend a hybrid approach for these designs, using flat embroidery for the small details and 3D for the most prominent elements of the logo.
How many colors can I use in a 3D embroidered patch?
You can use multiple colors, but I suggest limiting your 3D elements to two or three colors for the cleanest result. Each color change requires the machine to stop and reset over the foam, which can increase the risk of shifting. Using a few bold colors helps the raised sections stand out more effectively and ensures the final product looks intentional and high-end.
Is 3D embroidery as durable as flat embroidery for workwear?
3D embroidery is very durable, though the raised threads are slightly more prone to snagging than flat stitching. Because the design sits higher off the surface, it can catch on rough edges if used in high-friction environments. For heavy industrial workwear where snagging is a constant risk, I often suggest using our PVC patches as a more rugged, raised alternative.
Does 3D embroidery cost more than flat embroidery?
Yes, 3D puff typically costs more than standard flat embroidery due to the specialized materials and labor involved. You have to account for the cost of the EVA foam and the fact that our machines must run 25% to 40% slower to ensure quality. The digitizing process is also more complex, as it requires specific “capping” and underlay techniques to secure the foam properly.
Can I wash 3D embroidered patches in a standard washing machine?
You can wash them, but I recommend using a cold, gentle cycle and letting them air dry to protect the foam. High heat from a dryer can cause the EVA foam to shrink or lose its structural integrity over time, which ruins the “puff” effect. By avoiding high temperatures and harsh agitation, you can keep your 3D patches looking sharp and voluminous for years.